Friday, December 31, 2021

On the Sixth Day of Christmas

 Another year that started as it ended...with COVID-19 lots of people sick and a lot of deaths. For the first time in my time and I think history the President of the US started a riot that caused some deaths and lots of injuries and the government has done nothing to him amazing how for some crimes or issues they are quick to make an example of people and for others they just let them break the law and do whatever, when no one is above the law or so we think. We are a country that should be better, show better but hasn't. It was the first time in the US history to have a president impeached twice in a 4-year term although it was nothing since he continue in office until he lost the election thank goodness as we don't want a President that breaks the law as an example to the citizens.

As every year I start with the loses we had. One of my adoptive relatives loss her daughter Melinda in January of COVID, we loss my cousin Toñito in January also of COVID, my cousin's BIL David also died of COVID in February, my uncle Chava died in February of a heart attack, one of my online stamping friends loss her dad in March, a good friend from Mexico Lulu also died of COVID in May

two of my best friends in Mexico lost a brother in August to COVID and their sister Teresa in September to complications on health issues, another friend in Mexico lost her dad Jesus also in August and Bret lost his dad. The sadness loss of all here on earth was my mom, that suddenly died a couple days ago, leaving my dad behind. They had been married less than 2 months shy of 59 years a lifetime. 

Lots of deaths this year but guess I always say that, there was one new baby from an online stamping friend, her 4th grandson Grayson, first son of her daughter Britney what a blessing.

Our oldest Granddaughter turned 11 this year and graduated from 5th grade in the June and moved to middle school to start in person 6th grade in August and started with sports by playing soft ball and basketball guess season is short on soft ball but she did well and she's doing well on basketball too. She is as big as me if you don't count the shoes LOL


Our other Granddaughter turned 5 this year still not in school but next year she'll start pre-school


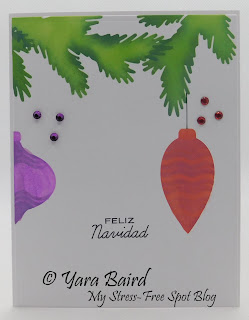
And now on the card, started with a piece of Accent Opaque Digital International Paper 100 lb. Cover Smooth white cardstock then stamped Slimline all spruced up stamp set by Trinity Stamps with Altenew crisp dye ink tropical forest collection moss, olive & parrot on a scrap piece stamped the poinsettia VersaFine Clair tulip red and Memento rhubarb stalk applied with ergonomic brush and added a little shade with Copic Marker, for pine cones VersaFine Pine cone and Memento rich cocoa applied with blending brushes then I die cut everything with matching dies then using Erin Lee Creative blending brushes added some Tim Holtz distress mowed lawn around the edge. Added a rhinestone from stash and some Spectrum Noir sparkle Crystal clear glitter brush,  then I mounted to Core’dinations Foundations canvas texture 65 lb. Holly leaf cardstock and stamped the messages one is from Merry stamp & cut set by HA and the other Spanish sentiments stamp set by Little Darlings Rubber Stamps both stamped with VersaFine Clair nocturne ink then moun and finally mounted to a card base Accent Opaque Digital International Paper 100 lb. Cover Smooth white cardstock

Thursday, December 30, 2021

On the Fifth Day of Christmas

 For this card, I started by cutting my card base with Recollections 65 lb. red shades and made it into a "s" fold then cut my scrapbook paper from The Paper Studio Scribble candy canes and a scrap of Park Lane 110 lb. smooth white solid core cardstock 12x12 for the top I cut another piece of Recollections 65 lb. red shades with mini slimline stitched stacklets and then I die cut my Candy cane 3 white and one red and did in-lay technique. The Merry Christmas stamp is by Impress and the Spanish is from Global greetings Christmas wishes by Papertrey Ink both with VersaFine Clair nocturne ink


Wednesday, December 29, 2021

On the Fourth Day of Christmas

For this card, I cut a piece of white core glitter cardstock brights stack by DCWV then ran it through the 3D textured impressions A6 FA LA LA folder by Courtney Chilson & Sizzix/Ellison then mounted to a base of Accent Opaque Digital International Paper 120 lb. Cover Smooth white cardstock and added Wink of Stella glitter brush black for the letters and red for the berries


Tuesday, December 28, 2021

On the Third Day of Christmas

For this card, I started by using a piece of Accent Opaque Digital International Paper 80 lb. Cover Smooth white cardstock then I die cut it with double stitched rectangle die by Kat Scrappiness then stamped pine bough background stamp by Taylored Expressions with Classic stampin ink mossy meadow then stamped my ornament from the stamp set ornament keepsakes by SU with Altenew crisp dye ink shades of purple collection deep iris and using the matching dies holiday ornaments Framelits die cut the top of the ornament with scraps of gold paper and with a Copic Multi Liner tuxedo black 0.3 pen and a ruler I hang the ornament in the branches. The message is from Christmas messages stamp set by HA with Altenew crisp dye ink enchanted garden collection Andromeda. Added Spectrum Noir sparkle Crystal clear glitter brush on the ornament then mounted on a scrap of purple card stock die cut with Cindy Echtinaw Designs Card Creator Perfect Layers A and then mounted on a card base of Accent Opaque Digital International Paper 120 lb. Cover Smooth white cardstock


Monday, December 27, 2021

On the Second Day of Christmas

For this card, I started with a layer of Accent Opaque Digital International Paper 80 lb. Cover Smooth white cardstock then I die cut it with double stitched rectangle die by Kat Scrappiness then I using my ergonomic brush and Tim Holtz distress oxide inks mowed lawn, rustic wilderness and lucky clover. Then stamp my image and message from the stamp set Holly berries by HA with VersaFine Clair nocturne ink and colored the berries with Copic marker then mounted on a precut piece of red cardstock with Cindy Echtinaw Designs Card Creator Perfect Layers A and mounted on a base of Accent Opaque Digital International Paper 120 lb. Cover Smooth white cardstock


Sunday, December 26, 2021

On the First Day of Christmas

This was one of the cards I sent this year. I started with embossing the tree, winter foliage 3D botanical embossing folder by Altenew on Tim Holtz idea-ology kraft-stock metallic jewels, because it wrinkle the paper I fuzzy cut the tree. This folder has a heart in the middle so at first I was going to emboss and fuzzy cut it out but then I decided to use my stitched hearts dies by Gina Marie Designs which was a bit bigger but it was ok as it was covering the whole embossed area then I cut my base of Accent Opaque Digital International Paper 120 lb. Cover Smooth white cardstock to fit the tree and then cut a piece of green cardstock from Recollections 110 lb. elementary pack cardstock same size as card base then a layer 1/4" smaller of peaceful prints sale-a-bration DSP by SU and mounted the tree. I stamped the message on scrap of Accent cardstock Color layering gingerbread house stamp set by HA with Memento cottage ivy dew drop ink and die cut it with Cindy Echtinaw Designs Card Creator Perfect Layers B


Saturday, December 25, 2021

Feliz Navidad & Merry Christmas

Back in September I took the Hero Holiday Stamp Along class, it was a two-day event, it only included the classes no product but they did give a list ahead of time in case you wanted to recreate the cards exactly as they were making them or you could find supplies in your stash that would work for the same thing which I did for some things. I didn’t end up stamping along, I just watch since time between Eastern time and Western time not very good so replay for me. Since I had all my supplies ready to go I finally worked on one card. 

I used Accent Opaque Digital International Paper 100 lb. Cover Smooth 11x17 white cardstock to make my base and then Accent Opaque Digital International Paper 120 lb. Cover Smooth white cardstock for each panel die cut with Cindy Echtinaw Designs Card Creator Perfect Layers then I started working on each panel. The pine branches were in the layering ornament and trimmings square stencil, I used Tim Holtz distress oxide ink and Picket Fence Studios life changing blender brush for all coloring, mowed lawn and with detail blending brush rustic wilderness. I made sure the pattern continued from one panel to the other if that’s what I wanted or needed so it didn’t look weird as when open you would see the whole card, closed it didn’t matter much. Then I did the ornaments some were from the same stencil the others from Layering ornament square stencil, on the first ornament I used scattered straw with fossilized amber, for the second ornament I put two layers together so I could continue the pattern and used wilted violet and dusty concord, the third ornament was candied apple and fired brick and the last ornament ripe persimmon and spiced marmalade. I used Copic multi liner tuxedo black 0.3 to hang the ornaments. The first message is from Christmas messages stamp set, the middle message is from Papertrey Ink stamp set global greetings Christmas wishes and the last message I don't know who makes it all of them stamped with VersaFine Clair nocturne ink. I added Spectrum Noir sparkle Crystal clear glitter brush on all ornaments and then added some rhinestones to each ornament same color as the ornament.


To make easy the coloring of the ornaments I made a template from Holiday ornaments Frame Cuts like Daniel West suggested but I made it of stencil material so I can just clean and reuse instead of cardstock. Actually, this was 1 of 2 things I learned in the two-day class. Now, if there is a stencil I like and has matching dies I can buy it as I can do my mask and color the different component, before I hated to keep masking to use images because they were just too closed to each other so avoided those stencils. I know it’s good for us having lots of images in one stencil as is cheaper but too much work for me LOL

Friday, December 24, 2021

Feliz Noche Buena / Happy Christmas Eve

I joined a mingle aka swap called St Nicholas and that was the perfect theme to make a card for the grand-daughters. This year our youngest is 5 so she gets her own card just like the other grand-daughter that is 11. 

For the card, I started with blue pieces that were on my scrap drawer that were die cut with embossed edge nesting slim dies by Kat Scrappiness then using my Altenew ergonomic brush and Tim Holtz distress oxide inks made my sky with broken China, faded jeans and chipped sapphire and then over with tumbled glass with Picket Fence Studios life changing blender brush, then I wanted some platter but I’m bad at it so used a stamp from gorgeous grunge stamp set by SU with Unicorn pigment ink Hero Hues by HA then I die cut 3 times of Park Lane 110 lb. smooth black solid core cardstock the Santa from slimline series Christmas Magic coordinating die set by Trinity Stamps but cut off the last deer and cover the whole thing with black Wink of Stella glitter brush  it didn't give much glitter so added Spectrum Noir sparkle Crystal clear glitter brush. Then I stamped the ho!ho!ho! stamp by MB and Merry Christmas stamp by Impress both with VersaFine Clair nocturne ink. I mounted the front to a piece of Park Lane 110 lb. smooth black solid core cardstock and then to a base of Accent Opaque Digital International Paper 120 lb. Cover Smooth white cardstock


Thursday, November 25, 2021

Happy Thanksgiving

Wishing you all a very and blessed Thanksgiving Day. We have been thankful that even though with continue in pandemic we all have been healthy thankfully to the vaccines and being extremely careful those that do go out either to work or for necessary things otherwise we stay home. We have our family and extended adopted family, our chosen family

I have been enjoying making backgrounds with my ergonomic blending brushes as it’s not too hard on my hard. I have two sets one I have from Amazon because I love the colors so I don’t have to read the labels to know which color I’m grabbing but they only have 6 colors so do still need some extras for those colors that don't sell, these I have dedicated to my regular distress inks and my original black from Altenew for my oxide inks since I already have been using for them and those are the ones that have labels blue, red, purple, etc. just so I don’t contaminate my ink pads as they say you shouldn't use dye ink with pigment or oxide same as my blending brushes the Picket Fence Studios life changing blender brushes are for oxide as they were my original brushes and the Erin Lee Creative blending brushes are for regular distress that way I don’t have to mix my brushes and these are colored brushes. Black handles oxide inks color handles regular distress ink for OCD makes it easy. Anyway, for this card I used both the ergonomic brush and life changing blender brushes. I started by stamping pumpkin from the recent HA release color layering pumpkin stamp set with Altenew crisp dye inks golden sunset collection snapdragon, marigold, green valley collection grass field and mountain pine then die cut it with matching frame cuts, plus 3 more partial die cuts. The wagon it’s from classic editions dies by Heartfelt Creations & Spellbinders and I die cut 3 the top one I slit on the top so I could slide the stamped pumpkin then I mounted the other 2 and the partial 3 and aside. Then grabbed a piece of Accent Opaque Digital International Paper 80 lb. Cover Smooth white cardstock die cut it with double stitched rectangle die by Kat Scrappiness stamped one of the images from big world stamp set by Altenew with Altenew crisp ink fall harvest collection butternut then masked with a 2.5” EK Success circle and then started blending with Tim Holtz distress oxide fossilized amber, spiced marmalade and candied apple with ergonomic brush then removed masked and with regular blending brush I added ink to the moon/sun and with a bit of fossilized amber and ground with peeled paint. I mounted my elements and then stamped my message with VersaFine Clair pinecone from the same color layering pumpkin set


Friday, November 12, 2021

Fall birthday

After making the other cards I had some leftover pieces that I didn't want to throw away and at first wasn't sure what I was going to do but then decided they were perfect for a gatefold slimline some I had to cut a little to make it fit but since my cards don't have to be specific size as long as they fit a #10 envelope they work and these did. I used the HA release from last month for the focal point.

The card base is Recollections 110 lb. white cardstock, layer of Park Lane 110 lb. smooth black solid core cardstock on the first and brown on the second. The circles were also scraps. Die is autumn leaves fancy die, I used 3 layers on the acorn.


Thursday, November 11, 2021

Happy Veteran's Day

 Happy Veteran's Day to those men & women that have served our military. Thank you for your service

I made this card in their honor. Started with a piece of Accent Opaque Digital International Paper 80 lb. Cover Smooth white cardstock then using camo layering stencil from Erin Lee Creative with their blending brushes and Tim Holtz distress inks frayed burlap, ground espresso and crushed olive but didn’t like this last ink so I added forest moss. Then I cut the layer with double stitched rectangle die by Kat Scrappiness then I layered it to a precut of brown cardstock with Cindy Echtinaw Designs Card Creator Perfect Layers A and then mounted to a base of Accent Opaque Digital International Paper 120 lb. Cover Smooth white cardstock. I stamped the message from Altenew’s Land of the Free stamp set with VersaFine Clair fallen leaves and the soldiers are from Military strong stamp set by Colorado Craft & Company with same ink 


Wednesday, November 10, 2021

Thanksgiving

Still using up my fall background papers and for this I decided to make it Thanksgiving cards.

I started by cutting my background then a layer of brown cardstock mounted on Park Lane white core Ivory 110 lb. cardstock using scraps I stamped my messages using partial part of a stamp from the open falling leaves precut stamp set by Heartfelt Creations with VersaFine Clair pinecone mounted on another scrap and then added some rhinestones from stash


Tuesday, November 9, 2021

Fall thinking of you

I wanted to use up some of my fall background papers so decided to make some slimline card which is a great way to use a lot of paper with less waste. Started by cutting my background paper then cut a layer of brownish cardstock giving 1/16” border and mounted to a base of Park Lane white core Ivory 110 lb. cardstock and using scraps I stamped my message with blockandscriptsentiments2stamp set by The Stamps of Life with VersaFine Clair fallen leaves and then added some Jot Pop-up enamel dots stickers from Dollar Tree


for this last one, instead of the enamel dots I used Nuvo Crystal Drops bottle green because I ran out


Monday, November 8, 2021

With Sympathy

I needed a sympathy card to give to Bret and I had all a bunch of leftover pieces from 2 different fall cards I made and since a sympathy card pretty much can be anything I decided to use those pieces for his card. I started by grabbing a piece of Accent Opaque Digital International Paper 80 lb. Cover Smooth white cardstock to create my background with Tim Holtz distress oxide inks wasn’t sure which one between scattered straw or antique linen was lighter so I used both then fossilized amber with my ergonomic brush from Altenew and then with Picket Fence Studios life changing blender brushes added some wild honey on top edge and on bottom added some peeled paint and vintage photo. Let it dry for a few minutes then I die cut it with double stitched rectangle die by Kat Scrappiness and mounted to a precut piece of brown cardstock with Cindy Echtinaw Designs Card Creator Perfect Layers A and mounted to a card base of Accent Opaque Digital International Paper 120 lb. Cover Smooth white cardstock then added my elements. The leaves and acorn are from September 2021 released from HA autumn leaves fancy dies, the acorn has 3 layers, the wheelbarrow is from wheelbarrow2stamp die set from the club of the month April 2018, I did a little coloring to pretend it had shading with Copic markers and they were 3 layers. The message was a surgery message from Strawberry Jude Stamps as it was too long for my space watercolor roses with VersaFine Clair pinecone. For the inside I use a computer message since I wanted a personal message for losing a dad and my sympathy messages are general sympathy


Sunday, November 7, 2021

Happy 5th birthday

Our youngest granddaughter is turning 5, since we had no theme this year I we had not heard what she was into this year and I wanted to have the card ready before Halloween which could have given me an idea LOL anyway I know she likes ice cream and chocolate so this is the card I made her

I started with a layer of Accent Opaque Digital International Paper 80 lb. Cover Smooth white cardstock stamped my images from bananasplit2stamp club of the month set March 2019 by The Stamps of Life with W plus 9 Design Studio pure color dye black ink. I masked the 2 individual top scoops then stamped the bottom 3 scoops that is one image, then stamped the messages from number of years stamp set by SU with VersaFine Clair nocturne ink and then I color my images with Copic markers. Added Glossy accents by Ranger on the chocolate. I let it dry. Mounted on a scrap of lavender cardstock and then on a base of Accent Opaque Digital International Paper 120 lb. Cover Smooth white cardstock 


Since a friend wasn’t totally sure granddaughter will get the 5 scoops meant 5 years old, then did the inside by following the same as the front by adding another layer of the same scrap lavender cardstock and a layer of Neenah exact index premium 110 lb. cardstock and stamped from the same number of years stamp set by SU with VersaFine Clair nocturne ink and Memento grape jelly dew drop ink the happy 5th birthday and the other message is by Make An Impression with VersaFine Clair nocturne ink


Friday, November 5, 2021

Survivor

After I created this card my new stamp set arrived so I was able to make the other card I wanted to make for the lab technician at my doctor's office that although technically is not a survivor yet as she has to wait 5 years to be cancer free but she survived her treatment and so far she is doing well and as long as all continues the same will be cancer free for good so I wanted to give her a card.

I started by grabbing a layer of Accent Opaque Digital International Paper 80 lb. Cover Smooth white cardstock and I stenciled with Tim Holtz distress ink worn lipstick and ergonomic brush from Amazon the texture diamond designer stencil by MB leaving a white area on the center for the ribbon which I stamped with the same worn lipstick ink with SU's set ribbon of courage then I did some highlights with Copic marker then stamped again and did again the highlights then I die cut my layer with double stitched rectangle die by Kat Scrappiness and then mounted on a layer cut with a scrap of pink with Cindy Echtinaw Designs Card Creator Perfect Layers B and then mounted to the card base of Accent Opaque Digital International Paper 120 lb. Cover Smooth white cardstock. I stamped the words from the set Operation: Save 2nd Base by Color Play with VersaFine Clair nocturne ink and then decided to add some enamel dots from my stash


Thursday, November 4, 2021

Happy Anniversary

Today a dear friend and her hubby are celebrating 47 years of marriage if my math isn't wrong and being fall time I sent them a fall fun card using one of the new releases by HA.

Started by grabbing a piece of Accent Opaque Digital International Paper 80 lb. Cover Smooth white cardstock then stamped my pumpkin from the color layering pumpkin stamp set with Altenew crisp dye inks: warm and cozy collection orange cream & firebrick for the pumpkin, green valley collection shadow creek & green meadows collection hunter green for the stem then I masked the image using the matching die and stamped the background also a new release by HA leaves in the wind bold prints with SU classic stampin ink Sahara sand, then used a Copic Marker to ground the pumpkin. Die cut the layer with double stitched rectangle die by Kat Scrappiness and mounted it to an orange cardstock from Core’dinations from their vintage collection which I die cut with Cindy Echtinaw Designs Card Creator Perfect Layers A and finally mounted to a card base of Accent Opaque Digital International Paper 120 lb. Cover Smooth white cardstock which I had already had folder into a "s" fold I know you all call it "z" fold but who sees a card upside down to see the z? we all see the card upright or at least I do, I have never seen a card in a way other than flat or upright so always see the straight s never a z anyway.

For my messages I use Rose peonies stamp set from the sunshine & love stampTV kit with VersaFine Clair pinecone ink on the front and anniversary2celebrate stamp set by The Stamps of Life with VersaFine Clair fallen leaves ink on the inside.


Wednesday, November 3, 2021

Happy Tumorversary

 Recently a great lady celebrated a big accomplishment with help and support of her doctors and family and she has helped others in return during this time so I wanted to make her a card to celebrate her anniversary. Looking through my breast cancer sets saw that there was only images for support but not about surviving did check online found one that was forcing to order with dies so didn't want to it and the other wasn't going to get here soon enough but did get in the meantime went for plan B. I was surprised actually that only two sets that survivor on them, very disappointing as we are hoping they survive the fight for those that do fight and not just breast cancer but any cancer our cards are suppose to encourage everyone during and after I would assume but maybe they're just for the during and not expecting to send if they survive? just a rhetorical as like me I used you did it so that's what most people are doing 

Started with a layer of Accent Opaque Digital International Paper 80 lb. Cover Smooth white cardstock then I used my large oval dies by Spellbinders to make a mask then I used a stencil by Gina K Design square mandala with my ergonomic brush from Amazon and Tim Holtz distress ink wilted violet, shaded lilac and dusty concord then I cut my layer with double stitched rectangle die by Kat Scrappiness and used a blending brush from Erin Lee Creative and more dusty concord to darken the edges. Then I removed my mask and stamped the image from ribbon of courage by SU with Altenew crisp dye ink rock gray collection industrial diamond adding some shading with Copic Markers then stamped again with industrial diamond and colored with Copic Markers. The backup plan was using a message from a HA set congrats stamp & cut with VersaFine Clair nocturne ink and the 23 years was typed with the computer.

Mounted on a piece of lavender cardstock that was die cut with Cindy Echtinaw Designs Card Creator Perfect Layers A and then mounted to a card base of Accent Opaque Digital International Paper 120 lb. Cover Smooth white cardstock. Finally I added the Happy Tumorversary that was punch with SU large oval and lavender piece that was punched with scallop oval also by SU


Tuesday, November 2, 2021

Feliz Día de Muertos

 Today is Day of the death a day to honor our loved ones that had passed on. In Mexico is a big celebration, here in the States is more of a way to party but thanks to that I was able to find things to have an Altar this year as you are able to find lots of things to decorate for your parties 😀 My altar was a little different as I didn't add any photos for one as I believe you have to let the death rest after they are gone so I was not inviting them to come I was just honoring them. I had some paper skulls since they don't sell sugar skulls to add names of our loved one we were honoring. And also I didn't put fresh or real food as I'm not expecting visitors 😀 I would plan this better next year so Bret will do some steps and will have another area but in the meantime this is what I did


Now for the card I sent to my family, I started by using a layer of Accent Opaque Digital International Paper 80 lb. Cover Smooth white cardstock then I added Tim Holtz distress ink picked raspberry, Victorian velvet, carved pumpkin, crackling campfire, festive berries, ripe persimmon with Erin Lee Creative blending brushes; I let it dry for a few minutes and then I die cut it with Double stitched rectangle die by Kat Scrappiness then I stamped my images from Día de los Muertos stamp set by Inkadinkado with VersaFine Clair nocturne then decided it needed a bit more so I sprayed with my mixed of I believe Nuvo mica mist midnight horizon and maybe Imagine Sheer shimmer craft spray sparkle I forgot to label my mini mist spray, then I let it dry completely before I mounted on a layer of Park Lane 110 lb. smooth black solid core cardstock which I die cut with Cindy Echtinaw Designs Card Creator Perfect Layers A then stamped my word Feliz from Feliz stamp set by Elena Guillen-K & Sizzix/Ellison also with VersaFine Clair nocturne and finally mounted to my card base of Accent Opaque Digital International Paper 120 lb. Cover Smooth white cardstock


My sister also found some pan de muerto, I'm not supposed to eat this but not something we eat all the time, it's a once a year tradition so I will be having some since we found it and we were not able to have it last year 😂


Sunday, October 31, 2021

Happy Halloween

I had to make a Frankenstein card for a mingle aka swap so decided to use that for my card for Bret and our oldest granddaughter as it was such a cute image. I started with a layer of Accent Opaque Digital International Paper 80 lb. Cover Smooth white cardstock stamped my image from Franken Josh stamp set by Aki Fukuoka & Sparkle Creations with Lawn Fawnamentals premium jet black ink and colored with Copic Markers then restamped with VersaFine Clair nocturne ink then masked my image and using distress ink hickory smoke with DIY stencil of clouds and distress ink Pumice smoke for pebbles and Erin Lee Creative blending brushes then die cut my layer with Double stitched rectangle die by Kat Scrappiness. Mounted it on a die cut layer with Cindy Echtinaw Designs Card Creator Perfect Layers A of Park Lane 110 lb. smooth black solid core cardstock then stamped the bats with VersaFine Clair nocturne ink from Happy Halloween stamp & die template set by Stephanie Low & Spellbinders and finally finished my card base with Accent Opaque Digital International Paper 120 lb. Cover Smooth white cardstock


Saturday, October 30, 2021

Paper Pumpkin September 2018

This is one of my alternatives to my Frights & Delights Kit. I started by cutting my scrapbook paper into a layer size and then using a second design I glued a strip in the middle then I grabbed two die cut  ghost from kit and a silver foil circle/oval also from kit for the eyes using the kit's set with VersaFine Clair nocturne ink I stamped one of the tags from kit but cut off part of it to make it as tombstone and glued all to a base of Recollections 110 lb. white cardstock


Friday, October 29, 2021

Paper Pumpkin September 2018

This is an alternative to my Frights & Delights Kit. I started by cutting my Park Lane 110 lb. smooth black solid core cardstock then stamped the spider web from Flip the web stamp set by Taylored Expressions with distress ink picket fence then added some scrapbook paper on part of the panel and finally grabbed one of the die cut pumpkins from the kit and mounted all to a base of Recollections 110 lb. white cardstock


Thursday, October 28, 2021

Paper Pumpkin September 2018

This is an alternative to my Frights & Delights kit. I started by die cutting my orange cardstock from stash with Stitched rectangle die by The Stamps of Life then I used one of the spider treat bags from kit as a background. Then die cut the safari sunset die by HA and glued one of the die cut bats from kit adding two rhinestones as eyes by Recollections and finally added a silver foil boo also from kit mounting all to a base of Recollections 110 lb. white cardstock


Wednesday, October 27, 2021

Happy Halloween

This is another card that went into my donation box for Gray Matters Foundation. Again I started by cutting my base out of Park Lane 110 lb. smooth black solid core cardstock plus an extra strip which I embossed with Spiderweb embossing folder by Cuttlebug Provo Craft then cut my DSP Creepy crawly and decided which side would inside and outside. My white was Accent Opaque Digital International Paper 100 lb. Cover Smooth white cardstock I stamped Bramble sunrise stamp by MB with distress ink hickory smoke and then my message from Happy Halloween stamp set by Spellbinders with VersaFine Clair nocturne ink


Tuesday, October 26, 2021

Trick or treat

This is another card for my donation box to Gray Matters Foundation. For this set I started with a base of Accent Opaque Digital International Paper 100 lb. Cover Smooth white cardstock plus a strip which I embossed with Skeleton hands, spiders & spiderweb embossing folder by Sizzix then cut my Creepy crawly DSP; another piece of Accent Opaque Digital International Paper 100 lb. Cover Smooth white cardstock which I stamped with Spook2scare stamp of the month October 2010 by The Stamps of Life the spider web with distress ink hickory smoke, the hat with tangelo twist spot ink and the message with VersaFine Clair nocturne ink for the inside I added a layer of MFT Orange fizz cardstock and Accent Opaque Digital International Paper 100 lb. Cover Smooth white cardstock


Monday, October 25, 2021

Happy Halloween

This is another card for my donation box to Gray Matters Foundation. For these set I started with a base of Accent Opaque Digital International Paper 100 lb. Cover Smooth white cardstock plus a strip which I embossed with Bats embossing folder by Sizzix then cut my Creepy crawly DSP, added another piece of Accent Opaque Digital International Paper 100 lb. Cover Smooth white cardstock which I stamped my bats from Happy Halloween stamp set by Spellbinders with VersaFine Clair nocturne ink and message with tangelo twist spot ink. For the inside I put a layer of MFT Orange fizz cardstock and Accent Opaque Digital International Paper 100 lb. Cover Smooth white cardstock


Sunday, October 24, 2021

Happy Haunting

Another card for my donation box to Gray Matters Foundation. For these set I started with a card base of Accent Opaque Digital International Paper 100 lb. Cover Smooth white cardstock and extra strip which I embossed with Spiders embossing folder by Sizzix then cut my DSP Creepy crawly added another piece of Accent Opaque Digital International Paper 100 lb. Cover Smooth white cardstock which I stamped the spider web with Flip the web stamp set by Taylored Expressions with distress ink hickory smoke and the spider with VersaFine Clair nocturne ink and the message with tangelo twist spot ink. On the inside I added a layer of MFT Orange fizz cardstock and a layer of Accent Opaque Digital International Paper 100 lb. Cover Smooth white cardstock


Saturday, October 23, 2021

You're wicked cool

I was working on cards for my donation box to Gray Matter Foundation so I used one of the folds the SU people like to do to showcase their DSP as it's double sided and since I was using one of their old paper packs and I wanted to finish the whole pack it was a great way to kill two birds with one stone a nice way to make plenty of cards and showcase the paper. I started by cutting my base out of Park Lane 110 lb. smooth black solid core cardstock plus another strip of black which I embossed with one of the folders from Midnight haunting set by Cuttlebug Cricut then cut my DSP deciding which side would go on the inside and outside the paper pack was Creepy crawly, for my white on the front and inside I used Accent Opaque Digital International Paper 100 lb. Cover Smooth white cardstock. The halloween girl was stamped with distress ink hickory smoke and the message with VersaFine Clair nocturne and it's from color layering moonlit night stamp set