
Tuesday, April 30, 2019
Shoebox Tuesday
For today's project I had a simple card that was inspired by a card I saw at Create with Lynn I just changed the color obviously and I had one flower in the center and then fill the others and Lynn sort of had her flowers off center so more full flowers in her layer. We used sentimental rose from paper pumpkin set April 2019 with rose bud ink, the message is from hello friend wishes set by Mama Elephant also with rose bud ink

Monday, April 29, 2019
Homework Day 5
For this day it was embossing. Level 1 was normal wet embossing, just simple embossing. I don't like wet embossing it's messy so the first panel I did it got all blurry the second I forgot to do the embossing body so decided to just leave it as it was and this is what it came out. I used wallpaper art set and majestic bloom set with VersaFine Clair nocturne ink and clear embossing ink the message is from build-a-flower rose set with VesaFine Clair nocturne


I didn't do the advanced level since it was too much wet embossing and I really don't do wet embossing

For the intermediate level it was dry embossing with plastic stencils, since I don't have any Altenew stencils I used a stencil I had by Heidi Swapp

it is very light running it through the Vagabond even with two shims but was afraid to add another shim. The Thanks of from thanks die by Altenew cover with glossy accents. I mounted my layer with foam

Thank you Justine for challenging me with the homework to do things I don't like or procrastinate doing the things I wanted to do.
Have never posted anything on social media other than here in my blog so hope I'm doing this right
#Altenew #AltenewAcademy #ProgressiveCardmakingClass
Sunday, April 28, 2019
Homework Day 4
This class was dies or die cutting. Level one was just cutting dies the way they were intended to be and not doing anything other than that so this is my card with that level. I used Elizabeth Craft Design butterfly aperture die and for my message build-a-flower rose set by Altenew with Sapphire ink, did my banner with banner triple punch by SU

For the intermediate level was using the dies for something other than what they were intended so decided to use a technique I did a while back after I saw Jennifer McGuire tutorial using the stacked layers all together, I really like that technique and you get several cards at once. For these cards I used Spellbinders label 7 dies, enamel dots from my stash and the hello is from build-a-rose set by Altenew freebie from Simply Cards & Papercraft Magazine with VersaFine Clair nocturne


And for the advance level was using a technique and her technique was partial die cutting and turns out that it is also a technique in one of my Yahoo Groups and I had played with this technique in the past so decided to use it again. I used build-a-flower rose set and matching die by Altenew as well as their inks soft lilac, lavender fields, deep iris, midnight violet, bamboo, parrot and olive. For my background (you can barely see it on the photo) on the lavender layer I used one of the leaves in wallpaper art set with soft lilac ink, and a message from beautiful inside set with VersaFine Clair nocturne

Thank you Justine for challenging me with the homework to do things I don't like or procrastinating doing
Have never posted anything on social media other than here in my blog so hope I'm doing this right
#Altenew #AltenewAcademy #ProgressiveCardmakingClass
Saturday, April 27, 2019
Homework Day 3
Today's class was about masking. One subject I don't like, there was a time I did it often but because of it guess I just didn't like it LOL too much work cutting mask, back in the day we didn't have dies and now most dies don't work as they have borders well I only did one card for this homework and I guess it would be level beginner since I don't add another image around 😊
The card is not finish to what it will be as it's my dad's father's day card but it shows the masking part. I wanted to mask the lighthouse so I could do the background which was done with Copic airbrush system with B21, B41, B32 and some blending tool on the edge with broken China ink. I used The Stamps of Life stamp set lighthouse2stamp with Gina K amalgam ink jet black ink (like 4 times to get a nice black ink) and coordinating die to mask. The Stamps of Life has two dies one that cuts right at the edge of the image and one that leaves a border so in this case was great for the masking as I didn't have to cut my own mask the die did it for me just perfect. The words are from Guy greetings SU's set but the Spanish version Saludos entre amigos with Gina K amalgam ink jet black. I colored the lighthouse with Copic Markers


Thank you Justine for challenging me with the homework to do things I don't like.
Have never posted anything on social media other than here in my blog so hope I'm doing this right
#Altenew #AltenewAcademy #ProgressiveCardmakingClass
Friday, April 26, 2019
Homework Day 2
Continuing with my homework, the second class was about stencils. I really don't own many stencils back in the day when we did the dry embossing I have a lot of brass stencils but then it became hard on my hands so unless I could used them with my die cut machine I wasn't using them and I did use them with the Zip-E-Mate perfect sandwich but then that was hard on my hand so switch to the Vagabond that is electric and the sandwiches are harder to accomplish so don't use them anymore, anyway the plastic stencils I only got mainly for background for my Copic airbrush system so I could do a little background like sky, grounds, bricks and or maybe some other technique I saw. Looking through my plastic stencils picked these to do my homework
I guess this will qualify as the beginner level. Not a lot of Altenew supplies, the stencil is Penny Black it's sun catcher used blending tool to applied inks and used lavender fields and deep iris for highlights, olive for the stems. The thank you is from majestic blooms Altenew set with deep iris


I guess this will qualify as the beginner level. Not a lot of Altenew supplies, the stencil is Penny Black it's sun catcher used blending tool to applied inks and used lavender fields and deep iris for highlights, olive for the stems. The thank you is from majestic blooms Altenew set with deep iris

This would be intermediate level. Using two stencils one detail these stencils are by Memory Box, butterfly drifting and butterfly vine again used blending tool to applied inks originally I had applied wisteria on the first stencil but when I applied the detail stencil with Andromeda you couldn't see much of the wisteria so I had to go back and reapplied the butterfly drifting stencil with pink diamond. The message is from Altenew's kind words set with Andromeda ink

The advance level was using paste or any other medium with the stencils and for my card I used a stencil by Recollections. I mixed my paste with distress oxide reinker seedless preserves, the message is from kind words Altenew's set with seedless preserve ink

Making these cards specially the last one reminded me why I don't work with stencils, ink and paste way too messy. A lot better using the airbrush system LOL
Thank you Justine for challenging me with the homework to do things I don't like.
Have never posted anything on social media other than here in my blog so hope I'm doing this right
#Altenew #AltenewAcademy #ProgressiveCardmakingClass
Thursday, April 25, 2019
Shoebox Thursday by Darlene
For today's project Darlene had a graduation card for us including a diploma and all but since so far I can't think of anyone I need a card I just did my card as a regular card. For the background and the white piece we embossed it with confetti stars folder by CTMH, the believe is from little yellow bicycle cutting templates, the image from beautiful you was stamped with tuxedo black and colored with Spectrum Noir and Copic Markers


Wednesday, April 24, 2019
Homework Day 1
I decided to take one of the Altenew classes, Progressive Card Making, it's a six day class with Justine Hovey. Each class has a 3 levels beginners, intermediate and advance. The first class was stamping. For what I understood we had homework after each class not really sure what the homework is but I'm guessing is play with what the class was about either one or all of the levels, IF we wanted of course since being adults who is going to force us to play
The "beginner" part guess I do it a lot as to me is more of clean and simple style but I understand as an instructor you can say it's a beginner way of making a card and they may not do many of this type of cards but personally I love making these cards. Don't consider myself an expert by all means as I believe we all have something to learn every day specially in card making but I sure don't consider myself a beginner for making this type of cards 😊
I used my stamping tool to make my card, the sets I used were beautiful day and majestic blooms both by Altenew with VersaFine Clair nocturne ink

For this second card, the stamping was in the intermediate level. I also used my stamping tool. Stamps and inks are by Altenew. The flower if from lacy scrolls set stamped with soft lilac (hope you can see the shadow stamped) and deep iris inks, the message is from beautiful day set with midnight violet ink. The leaves that are barely seen are from lacy scrolls set with morning frost ink stamped off stamped then stamped off again and stamped again. I wanted a very very light color and straight forward was too dark and stamped off once wasn't enough. My stitched layers were done with MFT stitched rectangle STAX dies. The little drops were done with Nuvo clear

And the advanced level was wet embossing with masking and watercolor coloring none of my favorites the first one is messy and the others just don't care but who likes homework? no one but we all do it so I so I finished a project with wet embossing unfortunately not all stamping is with Altenew stamps the doily is hello doily by SU embossed with VersaMark and white embossing powder and for the watercolor I used Pearl Ex-press watercolor palette misty lavender. The message was stamped with sweet plum ink (I should have grab one of the Altenew inks but this one was right on my desk LOL) and the set is kind words by Altenew

inside

Thank you Justine for challenging me with the homework to do things I don't like.
Have never posted anything on social media other than here in my blog so hope I'm doing this right
#Altenew #AltenewAcademy #ProgressiveCardmakingClass
Tuesday, April 23, 2019
Shoebox Tuesday
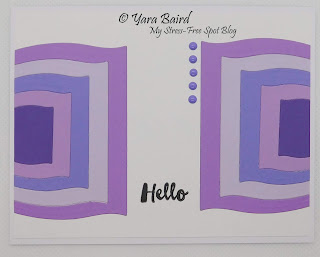
For today's project we worked on one of my Sunday Tip or Techniques from one of my Yahoo Groups. The original post was an Easter card by Connie Stewart but since I already had all my projects done before Easter decided to do the fold with a non Easter theme. Connie gave to options the simple card and the step up. Her step up was using ribbon and and punched flower well I decided mine was in between since I decided to decorate the inside, not to add the second circle punch and to decorate the striped border. All stamping was done with VersaFine Clair nocturne colored with dual markers. The border is pop up butterflies edge punch by Martha Stewart. On the circle we stamped off the bokeh circles with lady bug ink


Monday, April 22, 2019
Happy Birthday
Today is the birthday of a dear friend. This is the card I made him for my background I used mermaid lagoon and stormy sky inks with blending tool die cut my oval with pierced ellipse die then stamped images from best catch with VersaFine Clair ink the fish as well as the sign are brads I got at Impress or the show from Outlet Eyelet & Brads maybe. The whole piece is mounted on foam and then I stamped the corner border by PSX with mermaid lagoon ink


Sunday, April 21, 2019
Happy Easter
Wishing you a happy and blessed Easter. After I made yesterday's card I had a negative part as I had die cut with a plan you might say so this is what I made with that negative piece after I saw a card by Brenda Quintana, she punched hers so I made mine easier having an actual cross die 😊 I used the same die by Paper Smooches stitched wise for my hill and the message is by Endless Creation with hybrid black licorice ink


Saturday, April 20, 2019
Easter Blessings
For this easy Easter card I used happycalligraphy2stamp set by The Stamps of Life with ground espresso ink. the cross is a cutting, embossing & embroidery stencil from Joy! Crats by Chrissie Condoleance and the grass is a die by Paper Smooches Stitched wise


Thursday, April 18, 2019
Shoebox Thursday
Last Easter shoebox project for now. This card was inspire by creative craft with Cheryl. I made a changed to my card but pretty much was the same idea. I used a designer paper from a pack by K & Company that had lilies so was Easter looking to me 😊 the cross w/words is a folder by Darice, after embossing we sanded the words and then cut around. The DP was attached on the top and also on the back, the original card didn't have any decorations on the back but I decided I liked it better


I also added a white layer for a message which was stamped with VersaFine Clair nocturne with the springtime set by Poppy Stamps.

I also I punched a banner with the banner triple punch on both ends on one end stamped Happy on the other end stamped Easter with VersaFine Clair nocturne from crazy about you SU's set and cut where the word ended and attached behind the cross so when the cross is closed you don't see it but when you open you see the message

Wednesday, April 17, 2019
Snoopy bookmarks
A friend asked me to make her some bookmarks for her charity thing. They give out books and wanted to give a bookmark with the books. I don't do bookmarks just like ATC is not my thing. I think it's the little area to work with but after years of asking finally agreed last fall that as soon as I would finish the project I had I would work on them but after I did I got sick and then I just couldn't get any ideas. Anyway I got the bookmarks at Michaels stamped them and then mounted them in different color card stock mainly to used up my "scraps" also so they would have some color and more thickness although the cardstock was pretty good.
For all of them I stamped using the corner border stamp by PSX and the book stamp is by The Stamping Ground both were stamped with VersaFine Clair nocturne then I stamped my Snoopy stamps
For this one was a very old stamp dance of joy by Rubber Stamped with VersaFine Clair nocturne ink and London fog marker for the ground

For this one, I used Snoopy looking up by Stampabilities also with VersaFine Clair ink and bamboo leaves marker for the grass

For this one, I used Hooray Snoopy by Stampabilities also with VersaFine Clair ink and toffee crunch marker for the ground

For this one, I used Snoopy walking by Stampabilities also with VersaFine Clair ink and bamboo leaves marker for the grass

For this one, I used jumping Snoopy by Stampabilities also with VersaFine Clair ink and London Fog marker for the corner

Tuesday, April 16, 2019
Shoebox Tuesday
For today's project I decided to do another Easter card, I know too close to Easter but this is a quick card. I used Spellbinders' nested eggs and SU's rectangle stitched framelits, the message is from Easter blessings set by PPP with VersaFine Clair nocturne ink and the grass is from Easter eggs steel craft dies by Elizabeth Crafts.
After die cutting the rectangle and egg we stamped the message then we attached the bling which was from sheet like this, we just cut enough to go across from side to side

They had the option of multi color or one color.


then we attach to background paper mounted on pink layer and then the base. There was spaces in between the stripes of bling so you could see the background paper which was Easter paper
Monday, April 15, 2019
Baby girl
I sent this card for my foster cousin and hubby and foster aunt after their second grandbaby/great-grandbaby was born. I used baby's first framelits by SU with matching set something for baby with rose bud ink, the hearts are from charming cascade set by CTMH also with rose bud ink and the washi tape from my stash


Sunday, April 14, 2019
Happy Birthday
Today is a dear friend's birthday and this is the card I made for her. I used SU's lovely lattice sale-a-bration set. I stamped the image with tuxedo black colored with Copic Markers then restamped with VersarFine Clair nocturne then cut with pierced ellipse die I also cut a frame with Kat Scrappiness' double stitched rectangle dies. I mounted both on a pocket of tulle that made a bit of a shaker card of sequins from my stash and mounted everything to a lavender layer and then to my white base.
I wanted a bigger shaker area but all my stitched dies are for A2 cards. I don't think anybody makes dies for bigger cards like 5x7 as my guess in the US we mainly do A2; dies are expensive for A2 size I can only imagine a set for a 5x7 size even if it would be worth it but probably the demand wouldn't be much since again at least in the US not many people make bigger cards, and if you think about it the set would only have to be the difference from A2 to the 5x7 😊

I wanted a bigger shaker area but all my stitched dies are for A2 cards. I don't think anybody makes dies for bigger cards like 5x7 as my guess in the US we mainly do A2; dies are expensive for A2 size I can only imagine a set for a 5x7 size even if it would be worth it but probably the demand wouldn't be much since again at least in the US not many people make bigger cards, and if you think about it the set would only have to be the difference from A2 to the 5x7 😊

Thursday, April 11, 2019
Shoebox Thursday by Kathy
For today's project Kathy had a no stamping project for us but the front panel is ready to add a message IF and when we needed. The scallop circle punch is by EK and ribbon from her stash


Tuesday, April 9, 2019
Shoebox Tuesday
For today's project I had a clean and "simple" card. We used one of the embossing folders from the set Wedding Suite by Cuttlebug and one of the Embossing Diffusers by Sizzix. It didn't leave the flower uncover complete but mostly but it was good enough for me. I worked backwards but when it came for my friends to do their cards they did it the right way I guess. I know I wasn't sure what I was going so that's why I was going backwards with the card until I put it together anyway I embossed my cardstock with the diffuser and folder then stamped since I was using my stamping tool it didn't matter what was done first then mounted my pieces and then I decided to color my flowers with Copic Markers.
My friends stamped first then colored then embossed and put together. The message was stamped on a scrap paper and it was by Poppy stamps and punched with tailored tag punch by SU since it matches the image decided to use my Spectrum Noir alcohol marker to do a border so I didn't have to add extra paper or cut down the white paper. The tag was mounted on foam. My friends got to color their flowers with whatever medium them wanted as they brought their own so they could all color at the same time so they didn't have to wait for a color and they could just color as desire. They stamped with Gina K Amalgam ink as it's good with any medium

My friends stamped first then colored then embossed and put together. The message was stamped on a scrap paper and it was by Poppy stamps and punched with tailored tag punch by SU since it matches the image decided to use my Spectrum Noir alcohol marker to do a border so I didn't have to add extra paper or cut down the white paper. The tag was mounted on foam. My friends got to color their flowers with whatever medium them wanted as they brought their own so they could all color at the same time so they didn't have to wait for a color and they could just color as desire. They stamped with Gina K Amalgam ink as it's good with any medium

Saturday, April 6, 2019
Paper Pumpkin
These cards were done with the wildflower wishes February 2018 kit. The Spanish version was done with simplemente para ti SU hostess set with crumb cake ink and the English version with happy birthday stamp by MSE also with crumb cake ink


Friday, April 5, 2019
Paper Pumpkin
Last card made with this friends of a feather kit October 2018. I used blissful bouquet set October 2015 with night of navy ink


Thursday, April 4, 2019
Shoebox Thursday
For today's project, I have another Easter card. For this card I got the idea from Tracey from In my creative opinion well I had a very old stamp by Ann-ticipations of bunny ears that would work great for this card and the message is by Make an Impression. I decided to use background paper for my background instead of making my own so used a paper by Paper Pizazz and for the eggs a paper by Recollections, the stamping was done with VersaFine Clair nocturne and they colored with memento dual markers. The eggs were die cut with blessings set by The Stamps of Life and the pasture grass die is by Memory Box


Wednesday, April 3, 2019
Paper Pumpkin
Other cards made with friends of a feather kit October 2018. I used chalk it up to love set paper pumpkin August 2015 with fresh fig ink for this first card


seriously amazing set paper pumpkin August 2014 also with fresh fig ink also used classic label punch

everything else was from kit
Tuesday, April 2, 2019
Shoebox Tuesday
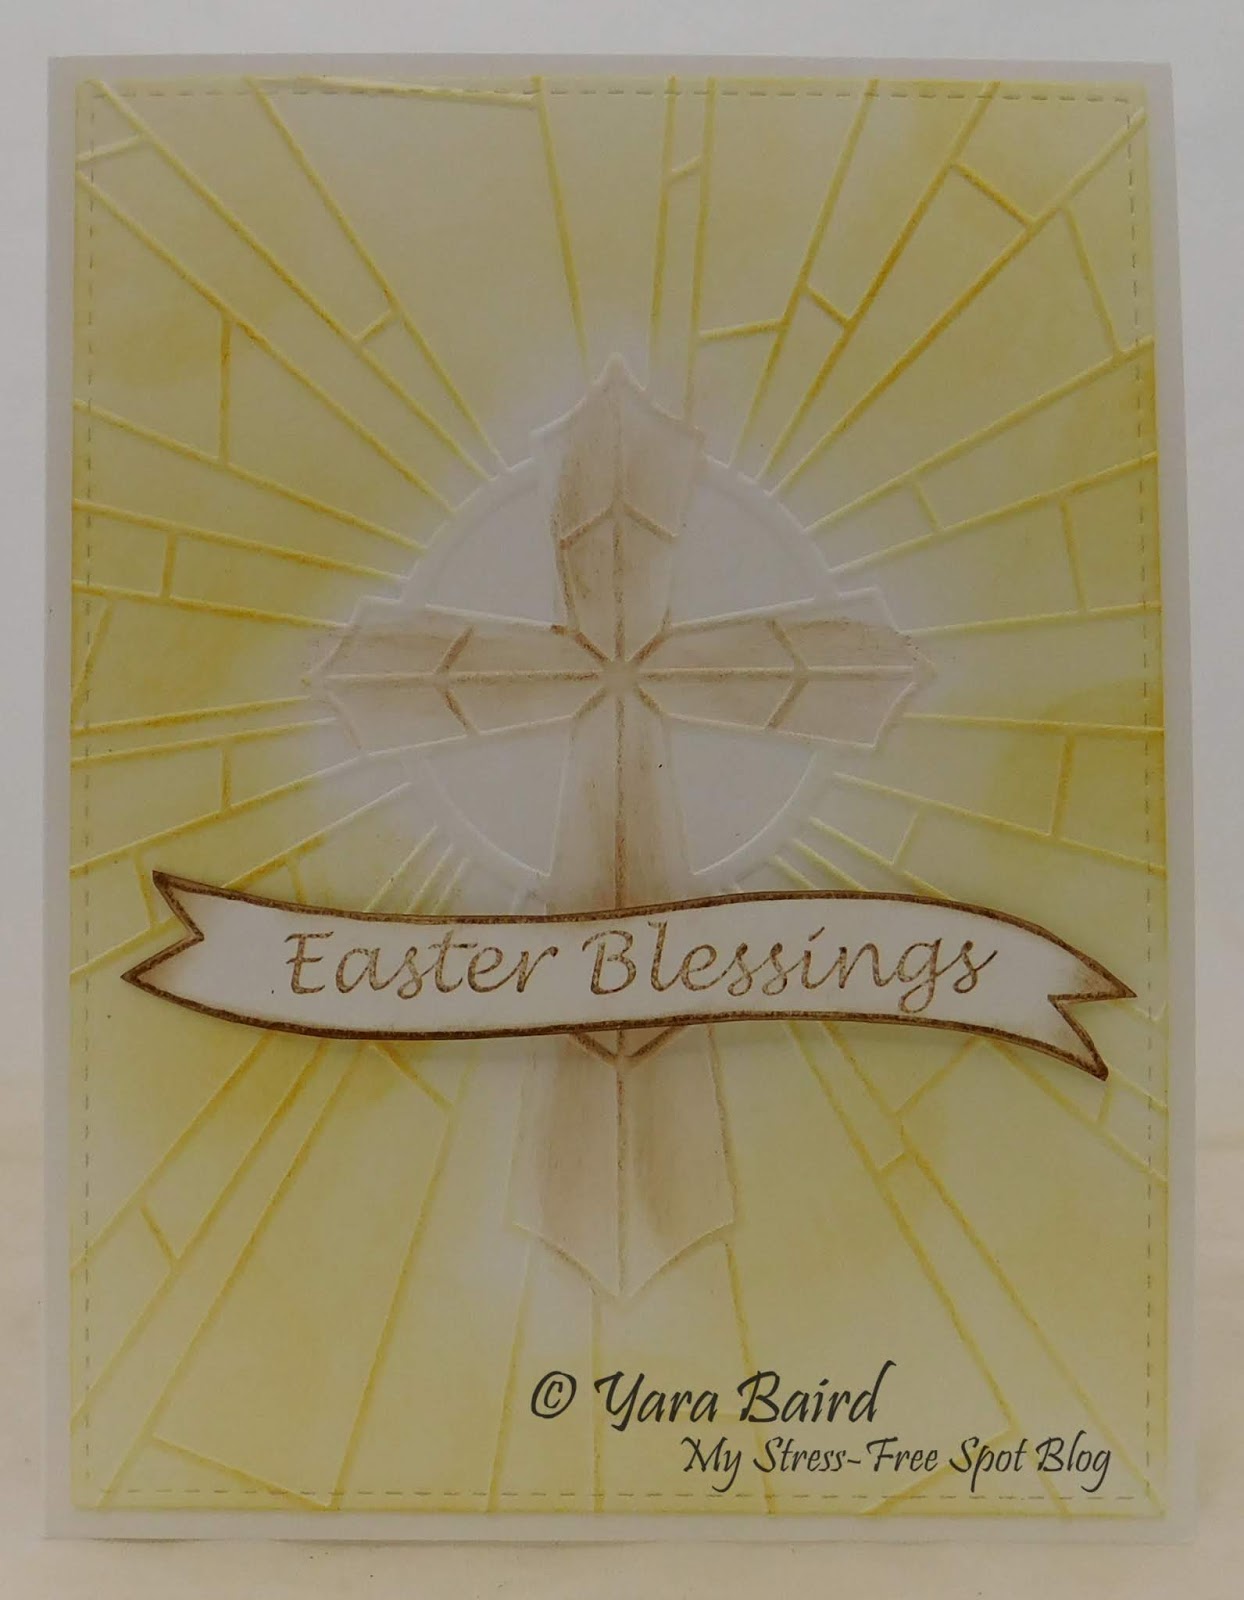
For today's project I have another Easter card. This one is more traditional using redeemer embossing folder by Taylored Expressions, double stitched rectangle die by Kat Scrappiness, we applied the color with blending tool and fossilized amber and vintage photo inks, the banner is Easter blessings by Make An Impressions stamped with vintage photo and sponged the edge with same ink mounted with foam

Monday, April 1, 2019
Paper Pumpkin
Another card made with friends of a feather October 2018. For this card I used flora and flutter set December 2017 with fresh fig. The banner was made with triple banner punch


Subscribe to:
Posts (Atom)