Back in September I took the Hero Holiday Stamp Along class, it was a two-day event, it only included the classes no product but they did give a list ahead of time in case you wanted to recreate the cards exactly as they were making them or you could find supplies in your stash that would work for the same thing which I did for some things. I didn’t end up stamping along, I just watch since time between Eastern time and Western time not very good so replay for me. Since I had all my supplies ready to go I finally worked on one card.
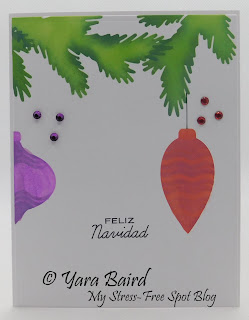
I used Accent Opaque Digital International Paper 100 lb. Cover Smooth 11x17 white cardstock to make my base and then Accent Opaque Digital International Paper 120 lb. Cover Smooth white cardstock for each panel die cut with Cindy Echtinaw Designs Card Creator Perfect Layers then I started working on each panel. The pine branches were in the layering ornament and trimmings square stencil, I used Tim Holtz distress oxide ink and Picket Fence Studios life changing blender brush for all coloring, mowed lawn and with detail blending brush rustic wilderness. I made sure the pattern continued from one panel to the other if that’s what I wanted or needed so it didn’t look weird as when open you would see the whole card, closed it didn’t matter much. Then I did the ornaments some were from the same stencil the others from Layering ornament square stencil, on the first ornament I used scattered straw with fossilized amber, for the second ornament I put two layers together so I could continue the pattern and used wilted violet and dusty concord, the third ornament was candied apple and fired brick and the last ornament ripe persimmon and spiced marmalade. I used Copic multi liner tuxedo black 0.3 to hang the ornaments. The first message is from Christmas messages stamp set, the middle message is from Papertrey Ink stamp set global greetings Christmas wishes and the last message I don't know who makes it all of them stamped with VersaFine Clair nocturne ink. I added Spectrum Noir sparkle Crystal clear glitter brush on all ornaments and then added some rhinestones to each ornament same color as the ornament.


To make easy the coloring of the ornaments I made a template from
Holiday ornaments Frame Cuts like Daniel West suggested but I made it of
stencil material so I can just clean and reuse instead of cardstock. Actually,
this was 1 of 2 things I learned in the two-day class. Now, if there is a
stencil I like and has matching dies I can buy it as I can do my mask and color
the different component, before I hated to keep masking to use images because
they were just too closed to each other so avoided those stencils. I know it’s good for us having lots of images in one stencil as is cheaper
but too much work for me LOL
No comments:
Post a Comment